Part I of this tutorial can be found here.
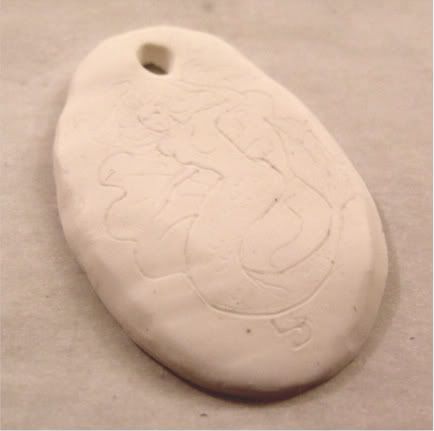 In the first part, I mentioned there were two ways to create the "carving" on a faux scrimshaw piece. The method we covered in part I was working with unbaked clay. The second method you could use is to prebake a blank piece, and then actually carve into the hardened clay to create the picture. This method requires a slightly sharper implement, but you can better control the depth of the cut. You can also sketch out your design in pencil before you make your carving, then erase all the lines for a clean finish. The only downside to this method is that, if you make a mistake, it is much more difficult to correct than it would be in soft clay. The carving comes out much finer in hard clay.
Part II: Painting your "Scrimshaw"
Materials:

- Acrylic paints
- VERY FINE grit sandpaper (not shown)
- Paper towels (important!!!) and brushes
- Water
- Drop sheet (you can use your parchment paper from part I)
- Paint-on polymer clay glaze or spray-on polyurethane (to seal)
How-To Process
After your baked piece has COMPLETELY cooled, rub the very fine grit sandpaper over the surface you are going to be painting. This will rough it up just a tiny bit so that the paint will stick. Use a mask and goggles if necessary.
When bone and ivory age, they become splotchy and yellowish like old paper. That's because they are made from hard natural fibers that are affected by environmental conditions. They also become smooth and shiny with handling. Keep these things in mind as you get set to paint your pieces.
 To recreate the look of aged ivory, choose a golden ochre paint. If you don't have a premade paint, simply mix some brown into yellow on a separate container or surface. Do not bother with brushes at this point; just use a paper towel to dab generous amounts of the paint onto the piece's surface. Move the towel in swirls on the surface to make sure that paint gets into all the crevices of your "carving". Wipe any excess off.
  Now, take a brown or dark brown paint and dab it onto just the "carved" sections of the piece. Do exactly as before: move the towel in swirls over the piece to make sure that the paint is sticking in the crevices of the picture. Wipe the excess off with a VERY LIGHTLY damp towel. You may repeat this process again and again until you are satisfied with the effect. If your piece gets too dark, feel free to repaint it from the beginning, using the ochre paint again.
The piece at this point will look pretty manufactured, so we will further distress it and add some little details to make it more realistic.

 You may use a dry brush to add some white to certain sections, being very careful not to let the white get into the carvings. You may also wait until the piece is dry and use the same piece of very fine sandpaper to rough up parts of the painted surface, just pulling off enough of the paint to make it shiny and lighter. Repeat the process with the brown paint above until you have a piece that looks suitably old and worn with handling. (Compare the picture on the right to the one above it!)
Here's a picture of the two sample pieces I made, one painted and the other not,
just to showcase the lovely transformation.

We are going to repeat the exact same process to paint the piece we carved after baking.

Ochre paint (mixed with a little white this time) dabbed on with a paper towel and then wiped off again.
 Brown paint dabbed on and rubbed off again a few times, allowed to dry, and then roughed up with the sandpaper. Note the roughed-up and finely worn edges; this process is perfect for emphasizing carved edges. Be sure to get inside the hole at the top of the pendant where the cord or beading wire will go through.
* Design option: You may use other colors of paint to add a tint to sections of your piece; for example, a watered-down blue or green for water. Just try to make it thin so that the "natural" ivory color will show through.
The last part of this process is sealing the pendants. When the paint is completely dry, you may turn the pendant over and paint the back black or ochre and brown to match the front. However, you must wait until that surface is completely dry before sealing the piece.
I used Sculpey glaze, but you may use a spray-on sealant instead. The benefit to using the glaze is that you can manipulate it so that it mimicks the natural fibers of bone by using a brush to put a generous amount of glaze on the surface, then drawing the brush repeatedly in the same direction across the surface to leave minute ridges in the glaze. Let the pieces dry in a well-ventilated area for 24 hours or according to the directions on the glaze/sealant packaging.

These would make great additions to historical costumes or the perfect gift for a pirate-lover. :D
Thanks, and hope you enjoyed this!
Let me know if you make your own; I'd love LOVE to see them!
--- --- --- --- ---
3 comments:
You are crazy-talented, you know that?
Love them both - good work!
So cool!!! They came out perfect : )
Hi, Jamberrysong! Wow, these are just stunning, and what a fantastic tutorial. Thanks for coming over to visit me, had to come see what you are up to. What a cool blog! I love the 150 prompts - that is genius. Nice to meet you!
Post a Comment