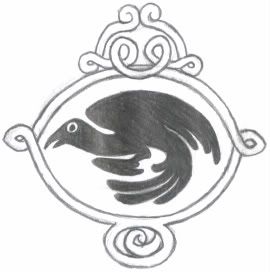
Recently in a local consignment store I found almost a complete set of Nick Bantock's Griffin & Sabine books. They are apparently very famous, but I'd never heard of them before. Why not, I thought. The covers were interesting and a quick flip-through of one suggested an adventure.
When I got them home, I dove right in without waiting. How fascinating! It begins with a mysterious hand-illustrated card from one artist to another with an outrageous claim: "I can see what you see." From there the story unfolds as the two get to know each other intimately through this long-distance correspondence. The entire thing is told through pictures and letters. Because of the nature of its media, it has been described as a "pop-up book for adults." Think Pirateology, Dragonology, Wizardology... but with a beautifully rich plot in place of informational text.
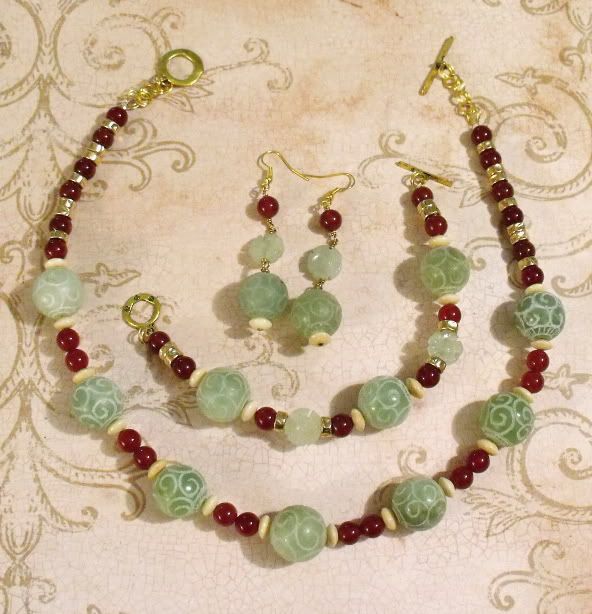
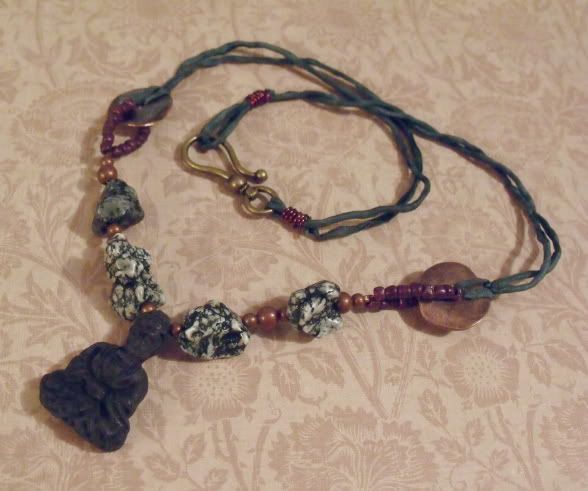
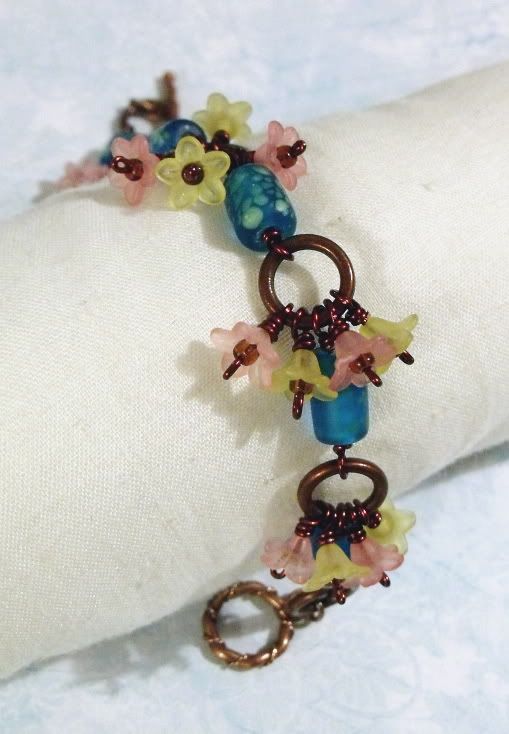
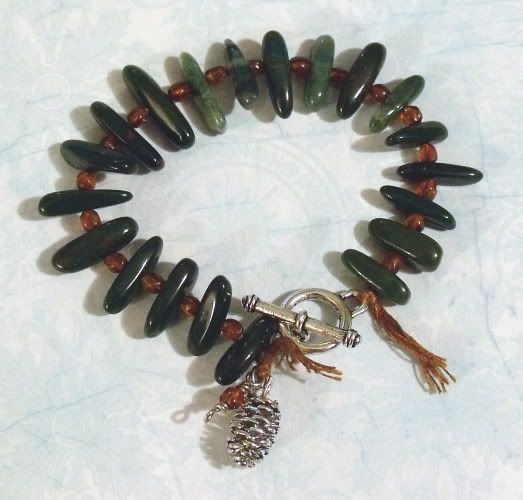
I want to try something similar for the month of August. However, instead of beautifully illustrated cards and letters, I was thinking handmade jewelry and photography. It would involve making a piece, writing a letter, and (though optionally for this) taking pictures for each week of August. This would come out to four posts in total---not TOO demanding, but at the same time a nice little challenge.
The letters can be written about anything; the inspiration behind the piece, thoughts for that time of year, commentary on activities, philosophy, art, reminiscences, etc. etc. etc. The pieces can be made with anything from the partners' respective stashes, but after the first week they MUST be a response to their partner's piece from the week before. In this way, each person will be setting the stage and overall feeling of the entire project through the first pieces. All materials for the week will be posted on the participants' respective blogs on a fixed day of the week (Thursday, for example). Partners may comment on each others' blog posts, but should really use their letter for the next week to respond. I am also considering a bead swap as part of the project.
I think this would be interesting. At first I was going to put up a wanted notice for just a partner for myself, but if other people are interested, they are also welcome to join. Note that I am talking about August---I'm actually planning ahead this time! XD
So, comment here if you're interested in participating!
----- ----- -----
Showing posts with label projects. Show all posts
Tuesday, July 5, 2011
Wanted: Project Pals
Wednesday, June 29, 2011
Bead Table Wednesday - Vintage on the Brain
It's Bead Table Wednesday again! This week, I've sure got some pretties for you. For the last week and a half, my bead table has been covered with vintage treasures just waiting to be repurposed into new treasures.
You know we moved recently. You may also remember from this post that the nearest city---though it's not very big---is full of old, old money. A lot of lovely pieces make their way into local antique stores and flea markets here. So you can probably imagine that I've been running around like a kid in a candy shop since we got here, gathering pretties to use! I love the vintage look and, when I can get my little grubbies on the real stuff, boy, I take it.
Lately, I've been particularly drawn to early- and mid-twentieth century faux ivory. Do you remember my faux scrimshaw tutorial? Yeah... it's sorta been a lifelong obsession... Hahaha! Anyway, below are my most recent finds: two carved Bakelite flower pendants, one with its necklace still intact; and a molded floral celluloid dress clip.
They are just so delicate and so beautiful; I love them. Now I've never had these kinds of materials before and had to do quite a bit of research to discover what they are. They're made out of very early plastics, some of the first ever made for the market. How awesome is that? Apparently Bakelite has become very valuable and sought after in recent years, too; not bad for a plastic! (I've just added some links with information on Bakelite and celluloid to my resource page, if you've got a hankering for a closer look.)
At the same antique store, I also found these lovelies: a small box of vintage beads/buttons and a grand piano key. The pendant on the right is a piece that was given to me by the owner of a gallery where I show my work. It is a glass and brass cabochon piece, probably made in the transitional period sometime between the art nouveau and art deco periods in the early part of the twentieth century, although the snake was a very popular symbol in Victorian jewelry as well. I don't know too much about it but it caught her eye and she bought it and gave it to me to make something with. She's the person who first got me into working with repurposed vintage jewelry and components. I consider myself extremely lucky because she basically gave me a shoebox full of stuff and told me to go to town. :D
Again, at the same antique store, I found these vintage Avon lovelies. Meet my new friend, OwlFish!
It's been difficult working up my courage to actually work with some of these beauties, but I've finally overcome some of my fears. When I got the celluloid clip in the first picture, I bought another dress clip, too. It was a French brass filigree clip from the art nouveau period. I'm sorry I didn't get before and after pics, but here is the finished piece I made with it.
You know we moved recently. You may also remember from this post that the nearest city---though it's not very big---is full of old, old money. A lot of lovely pieces make their way into local antique stores and flea markets here. So you can probably imagine that I've been running around like a kid in a candy shop since we got here, gathering pretties to use! I love the vintage look and, when I can get my little grubbies on the real stuff, boy, I take it.
Lately, I've been particularly drawn to early- and mid-twentieth century faux ivory. Do you remember my faux scrimshaw tutorial? Yeah... it's sorta been a lifelong obsession... Hahaha! Anyway, below are my most recent finds: two carved Bakelite flower pendants, one with its necklace still intact; and a molded floral celluloid dress clip.
They are just so delicate and so beautiful; I love them. Now I've never had these kinds of materials before and had to do quite a bit of research to discover what they are. They're made out of very early plastics, some of the first ever made for the market. How awesome is that? Apparently Bakelite has become very valuable and sought after in recent years, too; not bad for a plastic! (I've just added some links with information on Bakelite and celluloid to my resource page, if you've got a hankering for a closer look.)
At the same antique store, I also found these lovelies: a small box of vintage beads/buttons and a grand piano key. The pendant on the right is a piece that was given to me by the owner of a gallery where I show my work. It is a glass and brass cabochon piece, probably made in the transitional period sometime between the art nouveau and art deco periods in the early part of the twentieth century, although the snake was a very popular symbol in Victorian jewelry as well. I don't know too much about it but it caught her eye and she bought it and gave it to me to make something with. She's the person who first got me into working with repurposed vintage jewelry and components. I consider myself extremely lucky because she basically gave me a shoebox full of stuff and told me to go to town. :D
I don't know what I'm going to do with him yet, but whatever it is, it's going to be fun!
It's been difficult working up my courage to actually work with some of these beauties, but I've finally overcome some of my fears. When I got the celluloid clip in the first picture, I bought another dress clip, too. It was a French brass filigree clip from the art nouveau period. I'm sorry I didn't get before and after pics, but here is the finished piece I made with it.
I removed the clip back and folded the prongs down for balance, then used wire to fashion connectors to the back. After a TON of deliberation, I chose the turquoise bead to add because I love the look of brass and blue. :3 Then I used a color technique that I'll talk more about later this week and some antiqued brass chain to build the necklace around the piece. I really, really love the way it turned out.
Anyway! Phew... this post was longer than I thought it was going to be. XD
Please be sure to check out the awesome stuff that everyone else is sharing
for Bead Table Wednesday!
----- ----- -----
Wednesday, June 1, 2011
Bead Table Wednesday (And a little Tickle Me)
Eep! I'm late getting my post up this week, and completely missed 'Tickle Me Tuesday" yesterday. XD What's tickling me this week is baby birds.
My bead table is a mess of partly finished projects, some in better state than others. You'll see bits of my electro-chemical etching supplies, all of my Tim Holtz keys and keyholes and clock gears/wheels, stamps, pirate stuff, antique keys, wire, my new translucent Sculpey (which I haven't tried out yet, but am really excited about!), my first polymer clay cabochons, some stones and beads I bought Monday on our trip to Sacket's Harbor, and so on.
It's a mess at the moment because I haven't had a chance to work or clean in several days because of the holiday and my sister's birthday, which we celebrated in Sacket's Harbor. I'll have pictures from that trip tomorrow. Lately, we've been doing so much stuff, I have too much to share on my blog! While I like to keep busy, I hope things calm down a little sometime soon.
It's sad but, unfortunately, not all the babies make it. :( Josh Pyke wrote a beautiful song about this:
My bead table is a mess of partly finished projects, some in better state than others. You'll see bits of my electro-chemical etching supplies, all of my Tim Holtz keys and keyholes and clock gears/wheels, stamps, pirate stuff, antique keys, wire, my new translucent Sculpey (which I haven't tried out yet, but am really excited about!), my first polymer clay cabochons, some stones and beads I bought Monday on our trip to Sacket's Harbor, and so on.
(And more at the Bead Table Wednesday Flickr group)
It's a mess at the moment because I haven't had a chance to work or clean in several days because of the holiday and my sister's birthday, which we celebrated in Sacket's Harbor. I'll have pictures from that trip tomorrow. Lately, we've been doing so much stuff, I have too much to share on my blog! While I like to keep busy, I hope things calm down a little sometime soon.
How was your holiday weekend? Are you having a productive week, too?
----- ----- -----
Monday, May 16, 2011
Mid-Monthly Challenge - First Hop!
I want to start something new, and invite everyone to participate. :) Each month right around the 15th or 16th, I would like to offer a new mini-challenge to base a design around. It might be a poem, a picture, a movie, or (in this case) a song.
This song is one of my favorites. It just captures that mysterious quality of a shifting seasons and the nature of certain things that people share with each other and others that they hide, evolving relationships, change.
The challenge is to listen to this song and read the lyrics as they play, then design a piece around its themes or inspired by them. It can be any medium, or even mixed media. We'll share these pieces at the end of the month in a little hop. :) Sound good?
Post a comment here to let me know if you're participating and I'll add you to the link list for the hop!
Best of luck. :D
----- ----- -----
This song is one of my favorites. It just captures that mysterious quality of a shifting seasons and the nature of certain things that people share with each other and others that they hide, evolving relationships, change.
The challenge is to listen to this song and read the lyrics as they play, then design a piece around its themes or inspired by them. It can be any medium, or even mixed media. We'll share these pieces at the end of the month in a little hop. :) Sound good?
Post a comment here to let me know if you're participating and I'll add you to the link list for the hop!
Best of luck. :D
----- ----- -----
Sunday, May 1, 2011
Theme Challenge: "Too Precise" pendant
I'm still plodding slowly through my 150 Themes Challenge list. The next prompt was "too precise" and I used one of the tumbled stones I bought at the aquarium we went to for my birthday. This stone is amazing and as soon as I saw it, I wanted to make something with it!
Ok, some information about this stone. It is a special kind of fiber optic-like mineral that magnifies images! This means that the challenge for me was to make the wire-wrapping exactly the same on both sides (harder than it sounds!) so that you can't see it so obviously through the stone. Speaking of seeing things through the stone, that's why I chose this project to answer the "too precise" theme---no matter what you wear this pendant with, it will go with your outfit! And almost too precisely, too, because it actually slightly magnifies what you see through it! Here's some example pictures:
So it's almost like you're wearing a little magnifying glass! You can even put it on a long chain and use it to help you read the newspaper! Too cool. :D
Anyway, on to theme #5: "the most cutting criticism".
Tomorrow is also my playdate with Patty from My Life Under the Bus blog! Too exciting. :D
----- ----- -----
Ok, some information about this stone. It is a special kind of fiber optic-like mineral that magnifies images! This means that the challenge for me was to make the wire-wrapping exactly the same on both sides (harder than it sounds!) so that you can't see it so obviously through the stone. Speaking of seeing things through the stone, that's why I chose this project to answer the "too precise" theme---no matter what you wear this pendant with, it will go with your outfit! And almost too precisely, too, because it actually slightly magnifies what you see through it! Here's some example pictures:
So it's almost like you're wearing a little magnifying glass! You can even put it on a long chain and use it to help you read the newspaper! Too cool. :D
Anyway, on to theme #5: "the most cutting criticism".
Tomorrow is also my playdate with Patty from My Life Under the Bus blog! Too exciting. :D
----- ----- -----
Monday, April 18, 2011
World Tour
This weekend was a busy one for me! Did everyone else have a productive couple of days?
My work had a number of diverse inspirations. I love living in this time period, having access to all of history and all of the world's cultures. In many ways, it feels like freedom. :)
First up, a commissioned set. A friend "gave" these beads to me in order to make her something with them. I really love how this set turned out. It reminded me of the ancient Minoans; the Minoan palace at Knossos is pictured above.
Next is Buddha and ancient Asia.
Then we skip a few centuries and head to impressionist France.
And, while we're in France, let's step back a century or so to visit Marie Antoinette!
My work had a number of diverse inspirations. I love living in this time period, having access to all of history and all of the world's cultures. In many ways, it feels like freedom. :)
First up, a commissioned set. A friend "gave" these beads to me in order to make her something with them. I really love how this set turned out. It reminded me of the ancient Minoans; the Minoan palace at Knossos is pictured above.
Next is Buddha and ancient Asia.
Then we skip a few centuries and head to impressionist France.
And, while we're in France, let's step back a century or so to visit Marie Antoinette!
Finally, it's off to the Americas and to the Pacific Northwest, where the great sequoias grow.
----- ----- ------
Wednesday, April 6, 2011
Bead Table Wednesday
Oh gosh, another week gone by. Snap!
This past weekend I engorged myself with beads and beady things. Michael's and JoAnn Fabric are both having huge and fabulous sales, so um... Yeah... I tried not to go too crazy! I really did!
I've also still been scrambling to get things done for my show Saturday. This means I will miss the big bead fest in King of Prussia this time around. :( Ah, well. There's always next time, right? And I do plan to attend at some point! It would be fabulous to meet people I admire in person! Anyway, the show also means I'm scrambling to take pictures of things before they're potentially gone. Why am I so lazy when it comes to taking pictures? Some of these are new, and some are very old that I just never got pictures of. They've been sitting out on my bead tray, so I figured I'd post them, too.
New stuff for the stash:
This is my first pendant made with annealed steel wire:
I went over it lightly with a wire brush, but it will probably need to be sealed before I do anything else with it. Anyone have any suggestions about this? I've heard Renaissance Wax is good, but have never tried it myself.
"Cross My Heart" bracelet, made with the last beads I bought at my favorite hometown bead store that just went out of business. :(
"El Dorado"; this is made with matte-finish goldtone connectors and sun stones! I love sun stones. They have such an exotic color and an understated sparkle.
"Rain Dancer," made with Marsha Neal Studio silk cording and some beautiful apatite rondelles and fluorite briolettes (this is a favorite!):
"Earth Bear":
I'm looking forward to having all these projects done and photographed! What are you all up to this week?
----- ----- -----
This past weekend I engorged myself with beads and beady things. Michael's and JoAnn Fabric are both having huge and fabulous sales, so um... Yeah... I tried not to go too crazy! I really did!
I've also still been scrambling to get things done for my show Saturday. This means I will miss the big bead fest in King of Prussia this time around. :( Ah, well. There's always next time, right? And I do plan to attend at some point! It would be fabulous to meet people I admire in person! Anyway, the show also means I'm scrambling to take pictures of things before they're potentially gone. Why am I so lazy when it comes to taking pictures? Some of these are new, and some are very old that I just never got pictures of. They've been sitting out on my bead tray, so I figured I'd post them, too.
New stuff for the stash:
This is my first pendant made with annealed steel wire:
I went over it lightly with a wire brush, but it will probably need to be sealed before I do anything else with it. Anyone have any suggestions about this? I've heard Renaissance Wax is good, but have never tried it myself.
"Cross My Heart" bracelet, made with the last beads I bought at my favorite hometown bead store that just went out of business. :(
"El Dorado"; this is made with matte-finish goldtone connectors and sun stones! I love sun stones. They have such an exotic color and an understated sparkle.
"Rain Dancer," made with Marsha Neal Studio silk cording and some beautiful apatite rondelles and fluorite briolettes (this is a favorite!):
"Earth Bear":
I'm looking forward to having all these projects done and photographed! What are you all up to this week?
----- ----- -----
Wednesday, March 30, 2011
Bead Table Wednesday
Is it Wednesday again already? Time comes and goes; sometimes I'm only vaguely aware of its passing because I'm too much involved with various things. But we all feel like that, don't we?
Not this weekend, but the next I will be in a show. It's the first of the year for me and very exciting because it is a jewelry-exclusive one and I'm just flattered to have been accepted into such fine company. I'm hoping it will be a great chance to meet other jewelry makers from my area and network. Maybe I'll even meet someone to bead with! That would be so fantastic. :)
Anyway, so my "bead table" has been a bit strained as of late while I try to scramble a bunch of stuff together. I didn't realize I had so many half-finished projects tucked into all my bags and boxes. At some point you have to tell yourself, "NO! You cannot start something new until you finish at least three of these already-started ones." So that's what I've been up to.
I found these old Scrabble tiles in a box inside my parents' garage last time I was home. We have a beautiful Scrabble set, so I'm not really sure where these came from, nor do I know what I want to do with them, yet. I also recovered that beautiful shell, which is used in Native American smudging rituals. We tuck bound sprigs of white sage in there to burn for cleansing. From the left: "Dream Walker" (was experimenting with different ways to wire-wrap tumbled stones; this is quartz and amethyst with an agate thrown in), "Slave Charm III" (inspired by amulets that pre-Civil War domestic slaves would carry to ward off evil spirits and later pray for freedom), and "Auberon" (I'm loving those little branch focals; this time with coral, green fire agate rounds, vintage filigree beads, and Vintaj bead caps).
These are the Pollyanna prisms (read: chandelier crystals) and antique key I mentioned in my Victorian inspiration post last week. I just took the old, nasty, rusted wire off the prisms and am looking forward to using these for something.
And now for something entirely different...
You could probably tell from my last giveaway that I've got ocean on the brain. The one on the right began with a complete accident. I was trying to make one of those wire cuff bracelets with the woven beads, but something went wrong with my design and I couldn't get the wire to work out properly. In exasperation, I set it down and stared at it for a few moments. To my surprise, a fish was staring back! So I took some of the Marsha Neal Studio silk and made some wavy, fin-like flowy loops and then found some suitable oceany-colored beads, and then a sorta-kinda-almost a fish-hook-like hook (does that even make sense?), and voila! It's artsy and chunky and I love it. :3 This is also the first time I've ever fashioned a clasp of my own! Yeah, I'm a bit late to the party...
The middle one is a focal that I don't know what to do with, yet. (Yes, another half-finished project...) It was made with a huge blue stone bead that I bought at a bead store back in my college town before we moved away (*sniffle*), so I've had it for a while. Don't you think it is the perfect match with that beautiful pewter Green Girl Studio pendant, though? It's like the mermaid is peacefully drifting in the depths of the sea. The one on the far left was made with (believe it or not!) leftover beads.
This one is the most recent finished piece. It fits in with Andrew Thornton's theme this week: "Flight."
This one is special. It takes me right back to childhood, when we would sit out on our porch at dusk on muggy summer nights. The fireflies would be just starting to twinkle their little green lights in the meadow at the edge of our yard. All the moonflowers would unfurl their white petals, gently fragrant in the moonlight. And, across the road where an old school house stood dilapidated for ages, hundreds of birds (mostly swallows and sparrows and pigeons) would make a nightly dance. They would circle and swoop and flitter around, sometimes swinging so low, they'd touch the tall grasses with their wingtips. Then, all at once, they would descend upon the school house and disappear into all the cracks and nooks and broken windows until dawn would find them again the next day. That is what this necklace is about---that unfettered night joy, after a long beautiful sunny day, of coming home again to rest.
----- ----- -----
Not this weekend, but the next I will be in a show. It's the first of the year for me and very exciting because it is a jewelry-exclusive one and I'm just flattered to have been accepted into such fine company. I'm hoping it will be a great chance to meet other jewelry makers from my area and network. Maybe I'll even meet someone to bead with! That would be so fantastic. :)
Anyway, so my "bead table" has been a bit strained as of late while I try to scramble a bunch of stuff together. I didn't realize I had so many half-finished projects tucked into all my bags and boxes. At some point you have to tell yourself, "NO! You cannot start something new until you finish at least three of these already-started ones." So that's what I've been up to.
I found these old Scrabble tiles in a box inside my parents' garage last time I was home. We have a beautiful Scrabble set, so I'm not really sure where these came from, nor do I know what I want to do with them, yet. I also recovered that beautiful shell, which is used in Native American smudging rituals. We tuck bound sprigs of white sage in there to burn for cleansing. From the left: "Dream Walker" (was experimenting with different ways to wire-wrap tumbled stones; this is quartz and amethyst with an agate thrown in), "Slave Charm III" (inspired by amulets that pre-Civil War domestic slaves would carry to ward off evil spirits and later pray for freedom), and "Auberon" (I'm loving those little branch focals; this time with coral, green fire agate rounds, vintage filigree beads, and Vintaj bead caps).
These are the Pollyanna prisms (read: chandelier crystals) and antique key I mentioned in my Victorian inspiration post last week. I just took the old, nasty, rusted wire off the prisms and am looking forward to using these for something.
And now for something entirely different...
You could probably tell from my last giveaway that I've got ocean on the brain. The one on the right began with a complete accident. I was trying to make one of those wire cuff bracelets with the woven beads, but something went wrong with my design and I couldn't get the wire to work out properly. In exasperation, I set it down and stared at it for a few moments. To my surprise, a fish was staring back! So I took some of the Marsha Neal Studio silk and made some wavy, fin-like flowy loops and then found some suitable oceany-colored beads, and then a sorta-kinda-almost a fish-hook-like hook (does that even make sense?), and voila! It's artsy and chunky and I love it. :3 This is also the first time I've ever fashioned a clasp of my own! Yeah, I'm a bit late to the party...
The middle one is a focal that I don't know what to do with, yet. (Yes, another half-finished project...) It was made with a huge blue stone bead that I bought at a bead store back in my college town before we moved away (*sniffle*), so I've had it for a while. Don't you think it is the perfect match with that beautiful pewter Green Girl Studio pendant, though? It's like the mermaid is peacefully drifting in the depths of the sea. The one on the far left was made with (believe it or not!) leftover beads.
This one is the most recent finished piece. It fits in with Andrew Thornton's theme this week: "Flight."
This one is special. It takes me right back to childhood, when we would sit out on our porch at dusk on muggy summer nights. The fireflies would be just starting to twinkle their little green lights in the meadow at the edge of our yard. All the moonflowers would unfurl their white petals, gently fragrant in the moonlight. And, across the road where an old school house stood dilapidated for ages, hundreds of birds (mostly swallows and sparrows and pigeons) would make a nightly dance. They would circle and swoop and flitter around, sometimes swinging so low, they'd touch the tall grasses with their wingtips. Then, all at once, they would descend upon the school house and disappear into all the cracks and nooks and broken windows until dawn would find them again the next day. That is what this necklace is about---that unfettered night joy, after a long beautiful sunny day, of coming home again to rest.
----- ----- -----
Wednesday, March 2, 2011
Sneak Peek: March is for Creating Worlds! :D
If you are here for the Bead Soup Blog Party, you can find my post here!
I'm still blog hopping, but I wanted to post an update on something I'm planning for March. In fact, this is partly inspired by the BSBP; as I hop around and look at all the marvelous pieces that participants have created, many of them have made me think of other places, other worlds, and other times.
I like pieces that inspire these kinds of musings. They transport the viewer via imagination. Don't know what I mean? Pick up the newest copy of Belle Armoire Jewelry, or the books Enchanted Adornments by Cynthia Thornton of Green Girl Studios or Amulets and Talismans by Robert Dancik and you'll see!
As a writer, I am often involved with world-building---whether it's in my own work or while helping someone else with their stories. But you know, we're all involved in world-building as consumers. Everything from listening to music to watching a movie, from running a computer program to playing a video game, can transport us in our imaginations to other times and places.
"They had great broches of emerald, earings of pearls that were so great and round and plentifull that they were reminisent of small bunches of grapes. Also, they were adorned with gold that was laid in with bits of broken up shell, polished until they shone bright as opalls. These were the prince and princess of Perania, the ailand kingdom whose eye was always fixed upon the sea. As far as a Cormorin could dream, and further than he could see, her ships did sail; though none had ever reached Corminlan continent to the far south. Thus now did the Cormorin sailors gaze upon the fairest city in all of Evalan, faces full all of wunder, and they were quite enamoured of her..."
[sic.; Captain Darrow's ship logs, Chronicles of Evalan]
So this month I am devoting my blog to creating worlds and will be exploring how to capture this quality of imaginative transportation with jewelry. You're welcome to make this voyage with me. :) There will be creative prompts, tutorials, shared resources, inspirations, reviews, interviews and features, and we'll see what else!
----- ----- -----
Labels:
craft,
creating worlds,
ideas,
inspiration,
projects,
reader challenges,
themes
Tuesday, January 18, 2011
Tutorial: Faux scrimshaw pendants, part II
Part I of this tutorial can be found here.
Part II: Painting your "Scrimshaw"
Materials:
- Acrylic paints
- VERY FINE grit sandpaper (not shown)
- Paper towels (important!!!) and brushes
- Water
- Drop sheet (you can use your parchment paper from part I)
- Paint-on polymer clay glaze or spray-on polyurethane (to seal)
How-To Process
After your baked piece has COMPLETELY cooled, rub the very fine grit sandpaper over the surface you are going to be painting. This will rough it up just a tiny bit so that the paint will stick. Use a mask and goggles if necessary.
When bone and ivory age, they become splotchy and yellowish like old paper. That's because they are made from hard natural fibers that are affected by environmental conditions. They also become smooth and shiny with handling. Keep these things in mind as you get set to paint your pieces.
The piece at this point will look pretty manufactured, so we will further distress it and add some little details to make it more realistic.
Here's a picture of the two sample pieces I made, one painted and the other not,
just to showcase the lovely transformation.
We are going to repeat the exact same process to paint the piece we carved after baking.
Ochre paint (mixed with a little white this time) dabbed on with a paper towel and then wiped off again.
* Design option: You may use other colors of paint to add a tint to sections of your piece; for example, a watered-down blue or green for water. Just try to make it thin so that the "natural" ivory color will show through.
The last part of this process is sealing the pendants. When the paint is completely dry, you may turn the pendant over and paint the back black or ochre and brown to match the front. However, you must wait until that surface is completely dry before sealing the piece.
I used Sculpey glaze, but you may use a spray-on sealant instead. The benefit to using the glaze is that you can manipulate it so that it mimicks the natural fibers of bone by using a brush to put a generous amount of glaze on the surface, then drawing the brush repeatedly in the same direction across the surface to leave minute ridges in the glaze. Let the pieces dry in a well-ventilated area for 24 hours or according to the directions on the glaze/sealant packaging.
These would make great additions to historical costumes or the perfect gift for a pirate-lover. :D
Thanks, and hope you enjoyed this!
Let me know if you make your own; I'd love LOVE to see them!
--- --- --- --- ---
Saturday, January 15, 2011
Tutorial: Make faux scrimshaw pendants
"Scrimshaw" was the name given to amateur artforms practiced by sailors on long ocean voyages, usually on whaling hunts. It most commonly refers to carved bone, usually the teeth or other bones harvested from slain whales.
Today there are many restrictions on the use of ivory, even in the most prestigious of arts; this is understandable, since the material requires the death of living animals that share this earth with us. Many of these are endangered species because of centuries of hunting for their bones, teeth, and tusks. We do not want to encourage the killing of these animals or the trading of their parts, so instead we will use polymer clay and some other materials to recreate the look of aged scrimshaw.
Materials
- Polymer clay (I used FIMO here, but any kind would work), in white, ivory, pearl, or any variation of off-white color. (I used white here.)
- Some kind of sharp tool. I used an awl, but a mechanical pencil, toothpick, pin, or needle would also work.
- Rolling pin or noodle-style press.
- Parchment paper, two sheets.
- Cookie cutters. (It is advised that your tools for polymer clay are not to be used for food preparation.)
How-To Process
Roll the clay around in your hands until it is warm and pliable. Form it into a rough ball and place it on one piece of parchment paper. Flatten it slightly and place the other piece of parchment paper on top of the flattened clay. Use your rolling pin to thin and further flatten the clay.
If you are using a noodle-style roller press for your clay, roll it until it is approximately a millimeter or two thin.
You do not want your clay to be too thin, because otherwise it may break easily. Flip the clay by simply taking the corners of the parchment paper and turning it over with the clay inside so you can roll the other side. You can peel the paper apart to check on your progress and determine your clay's thickness. This looks pretty good. Just drop the paper back down if it needs to be rolled more.
When the clay is at the desired thickness, use your cutters to make shapes in it. Be sure to press down and twist to make sure the cut piece is released from the rest on all sides. You may be able to get more than one shape from your bit of clay. Just collect the left overs and reroll it and recut it until you have as many pieces as you want or as many as you can make at one time with what you have.
Twirl and brush your sharp implement along the edges of the pieces to give them a beveled, carved look. This will make the piece look more finished. Also used this tool in small swirls to make a hole near (but not too near!) to one of the pendant's edges. This is how you will be able to string the piece.
This pendant is an antique heirloom that really was carved from ivory. However, from the size and shape of the piece, I would venture a guess that it is probably made from a repurposed slice of ivory from an old piano key.
It displays one of the most popular subjects of scrimshaw carvings: a ship. Other popular subjects were historical events (such as important voyages), portraits, commemorative emblems, coats of arms, and sea creatures (such as whales and narwhals) and mythical creatures (such as mermaids).
To get inspiration, just go on Google Images and do a search for "scrimshaw".
For our two experimental pieces, I chose to do a ship and a mermaid.
The first method we'll cover is using soft clay before it is fired.
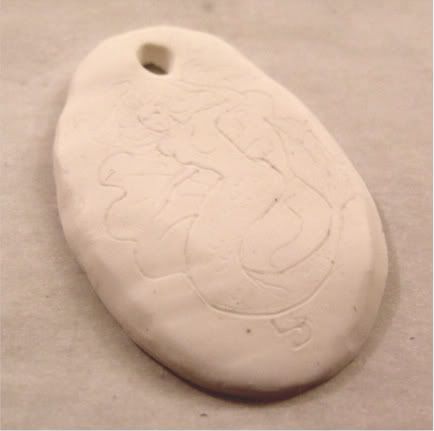
Use your sharp tool to lightly draw the outlines of the "carving" you want to make in your pendant. Feel free to add embellishments and simple cross-hatch style shading and details. You don't have to go too deep at all; just enough to make a crevace where the paint will catch later.
Take your pen or pointy tool and roll it gently over the top of the drawing the entire length of the piece to slightly rub out your "carving". Now, this might not make much sense at this time but trust me, it will add much to the finished piece. It will make it look worn with age and polishing.
Just before you are ready to bake the piece, check to see if there are areas that could use some reinforcement. This piece was a little too thin on top above the hole; I strengthened it by adding a little piece of clay to the back and rubbing lightly with my sharpened tool to get a good bond. Don't be too terribly worried about the back, since it is not what people will see and can be covered by paint later. The entire piece will be glazed at the end for added strength and durability.
Today there are many restrictions on the use of ivory, even in the most prestigious of arts; this is understandable, since the material requires the death of living animals that share this earth with us. Many of these are endangered species because of centuries of hunting for their bones, teeth, and tusks. We do not want to encourage the killing of these animals or the trading of their parts, so instead we will use polymer clay and some other materials to recreate the look of aged scrimshaw.
Part I - Making Your Scrimshaw
Materials
- Polymer clay (I used FIMO here, but any kind would work), in white, ivory, pearl, or any variation of off-white color. (I used white here.)
- Some kind of sharp tool. I used an awl, but a mechanical pencil, toothpick, pin, or needle would also work.
- Rolling pin or noodle-style press.
- Parchment paper, two sheets.
- Cookie cutters. (It is advised that your tools for polymer clay are not to be used for food preparation.)
How-To Process
Roll the clay around in your hands until it is warm and pliable. Form it into a rough ball and place it on one piece of parchment paper. Flatten it slightly and place the other piece of parchment paper on top of the flattened clay. Use your rolling pin to thin and further flatten the clay.
If you are using a noodle-style roller press for your clay, roll it until it is approximately a millimeter or two thin.
You do not want your clay to be too thin, because otherwise it may break easily. Flip the clay by simply taking the corners of the parchment paper and turning it over with the clay inside so you can roll the other side. You can peel the paper apart to check on your progress and determine your clay's thickness. This looks pretty good. Just drop the paper back down if it needs to be rolled more.
When the clay is at the desired thickness, use your cutters to make shapes in it. Be sure to press down and twist to make sure the cut piece is released from the rest on all sides. You may be able to get more than one shape from your bit of clay. Just collect the left overs and reroll it and recut it until you have as many pieces as you want or as many as you can make at one time with what you have.
Twirl and brush your sharp implement along the edges of the pieces to give them a beveled, carved look. This will make the piece look more finished. Also used this tool in small swirls to make a hole near (but not too near!) to one of the pendant's edges. This is how you will be able to string the piece.
This pendant is an antique heirloom that really was carved from ivory. However, from the size and shape of the piece, I would venture a guess that it is probably made from a repurposed slice of ivory from an old piano key.
It displays one of the most popular subjects of scrimshaw carvings: a ship. Other popular subjects were historical events (such as important voyages), portraits, commemorative emblems, coats of arms, and sea creatures (such as whales and narwhals) and mythical creatures (such as mermaids).
To get inspiration, just go on Google Images and do a search for "scrimshaw".
For our two experimental pieces, I chose to do a ship and a mermaid.
The first method we'll cover is using soft clay before it is fired.
Use your sharp tool to lightly draw the outlines of the "carving" you want to make in your pendant. Feel free to add embellishments and simple cross-hatch style shading and details. You don't have to go too deep at all; just enough to make a crevace where the paint will catch later.
Take your pen or pointy tool and roll it gently over the top of the drawing the entire length of the piece to slightly rub out your "carving". Now, this might not make much sense at this time but trust me, it will add much to the finished piece. It will make it look worn with age and polishing.
Just before you are ready to bake the piece, check to see if there are areas that could use some reinforcement. This piece was a little too thin on top above the hole; I strengthened it by adding a little piece of clay to the back and rubbing lightly with my sharpened tool to get a good bond. Don't be too terribly worried about the back, since it is not what people will see and can be covered by paint later. The entire piece will be glazed at the end for added strength and durability.
Add any last touches you want. I had a space at the bottom of my piece, so I added "1794"---the year the United States Navy was officially formed. :)
When you are happy with the design, bake the pieces following the instructions on the polymer clay packaging and allow them to cool completely before going on to the next step.
------ ----- -----
Subscribe to:
Posts (Atom)